As a developer, there is a good chance that as part of your job or training you’ve been using Github to store your projects or share them in order to collaborate with others. Depending on the time you have using Github you may have noticed how many features Github offers us. But, among this many features, it’s possible you may have not noticed (especially if you’re a beginner) that Github gives us the possibility of adding a custom profile to our Github page.
In this short guide, let’s see how we can create this profile and how we can style it in basically any way we want in order to make it look great.
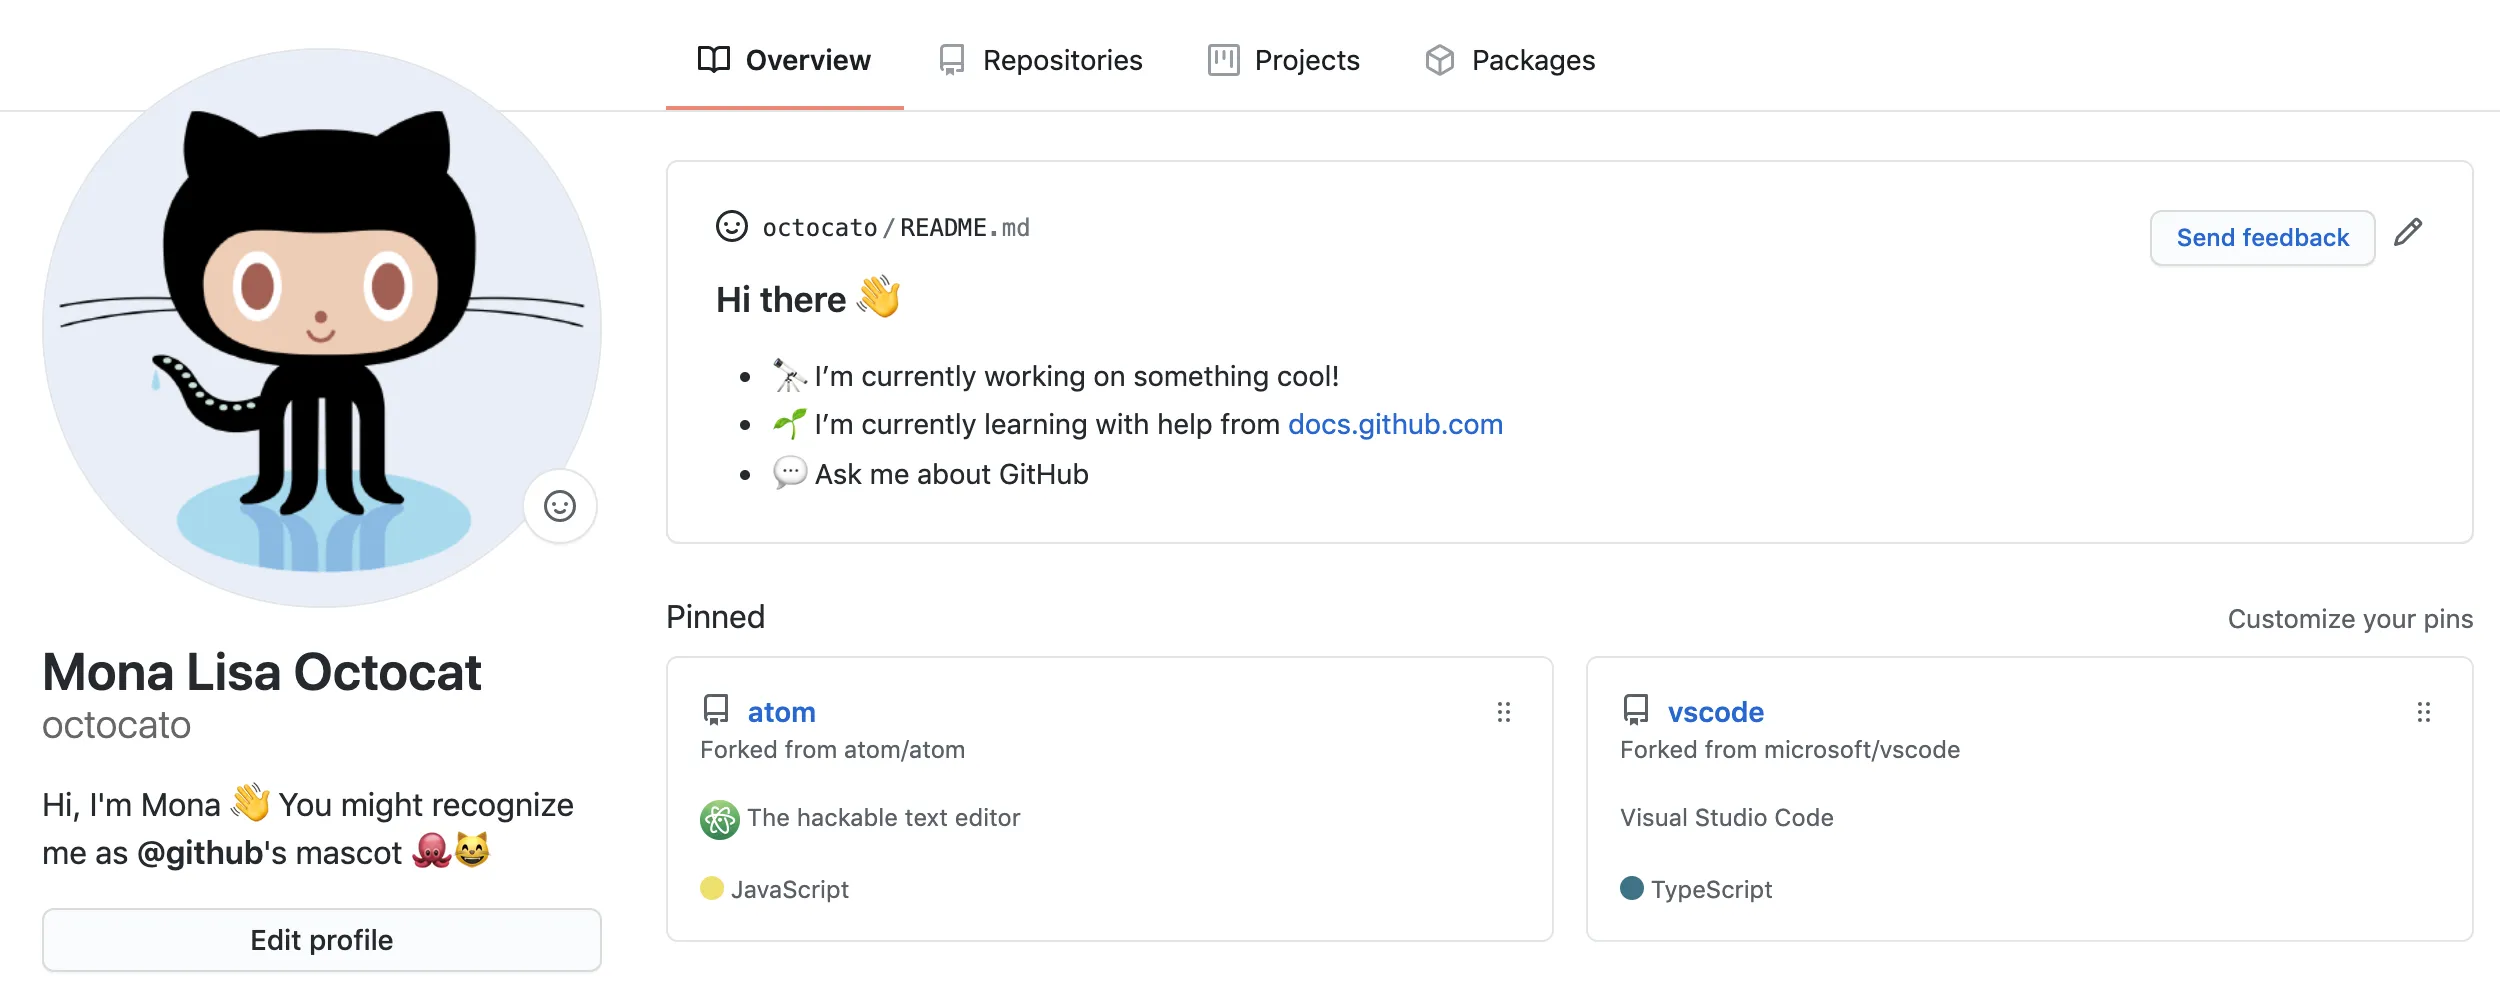
In case you don’t know what is a Github profile page, I will leave you a link here to my profile where you can see some of the features you can add to your profile and that I’ll describe in this guide.
You can check my Github profile here.
How to create a Github profile
Creating your profile page is as easy as it gets. The only thing you have to do is create a new repository and as a repo name, you have to put the exact same name from your user profile. As you can see from the image below if your user name is “octocat”, that’s the exact name you have to use for this new repository (make sure to type it exactly as your username).
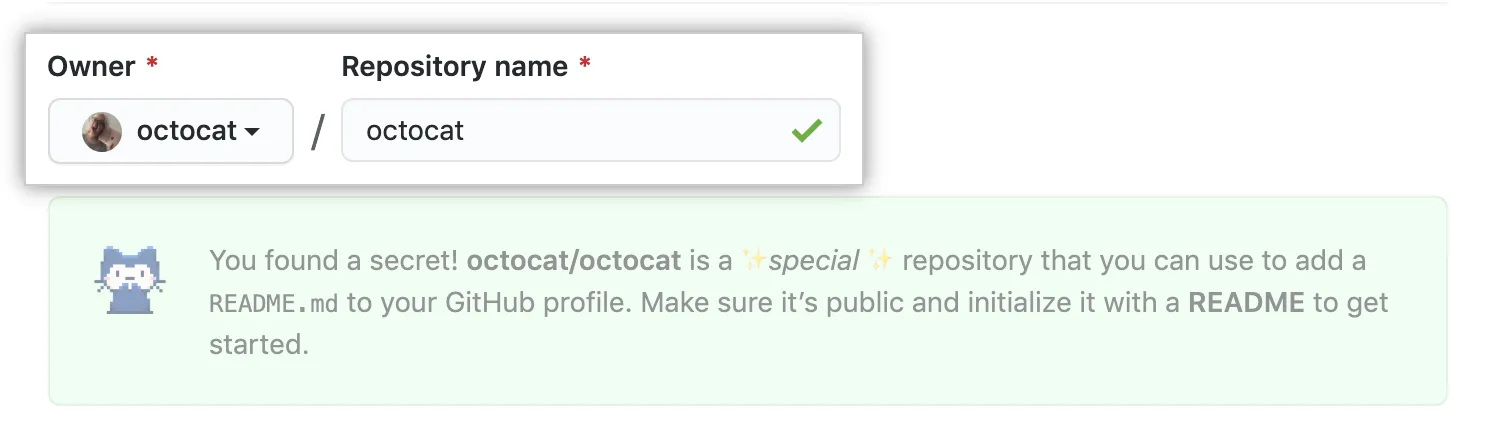
As soon as you add the name for your new repository, a green box with a message will show telling you that you discovered a special Github repo for your profile page. Also, you can add the README.md file here or create it later, in this guide, we will leave this file for later.
IMPORTANT: In order for this repo to be visible you have to create it as a public repo.
Now, since our profile is nothing more than a README.md file, we can edit it inside Github (if you didn’t create it before, you can create it now and start editing from Github). But I would suggest creating a special folder inside your computer, using this folder would be easier to manage the content for your profile.
Inside this folder initialize a new git repo and link it to the repo that you created on Github for your profile (the same way as if this was any other regular project you’re pushing), this way, every time you commit new changes you can push them to Github and your profile will be automatically updated.
$ git init
$ git add README.md
$ git commit -m "first commit"
$ git branch -M main
$ git remote add origin git@github.com:<your-username>/<your-username>.git
$ git push -u origin main
Once you create your new folder, inside create a file and call it README.md. This file will have all the content related to your Github profile.
In order to test that we connected our repo correctly, we can test it by writing some basic content in our README.md inside our favorite text editor. Below you can find some basic markdown text you can copy and paste to your file. Save the changes and push them to Github.
## Hi there
- 👷🏼♂️ I'm currently working on something cool!
- 🤓 I'm currently learning JavaScript
- 💬 Ask me about JavaScriptIf everything went ok, you should have something like the image below on your Github profile.
Of course, creating your profile page is one thing. But there is a high chance that you want to personalize it even more and make it actually yours. There are plenty of things you can add so, let’s get to it.
How to add Icons and images
The first thing we can add is some images, this can be static and other formats like .gif for example.
To add images you can use img tags and add to them an src attribute like this:
<img align="right" alt="GIF" src="https://github.com/abhisheknaiidu/abhisheknaiidu/blob/master/code.gif?raw=true" width="500" height="320" />Adding Icons is a bit more tricky, but nothing to worry about. In other to make the process easier we can make use of shields. This is a website that helps us get different stats from different platforms in real-time and create badges to display the collected data. But, you can use them just to display stuff like your favorite programming languages or projects you’re working on.
A simple line like this:
Can generate a badge or shield that looks like this.
There are dozens of different ways of displaying your shields so, here is up to you what end result you’re aiming for.
Note: In case you don’t know how to use the shields website, there are some short guides on Youtube that can help you. I would suggest using the JavaScript badge example I provided and just edit it to create some other badges.
I’ll add some more badges examples to help you out.
[](#)
[](#)
[](#)How to add stats
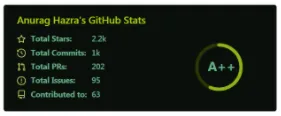
In order to add different stats from our repo, we’re taking advantage of another package that you can find here.
To add your Github Stats Card is as simple as copying this line of code and pasting it on your README.md file:
[](https://github.com/anuraghazra/github-readme-stats)Now, add your username where is indicated in the above code. As soon as you push your new changes to Github, you should see something like this:
You can check the package repo in order to add more cards to your profile. Also, you can change stuff like themes, icons, and many other interesting things, and you can find them just with a quick search of the documentation.
Pro Tip: If you’re using VS Code and you want to preview your README.md end result, you can use any extension for this purpose, I use this one. This saves me the time of pushing to Github just in order to preview the end result of my changes.
Skies are the limit…
In this post, I just showed you the most basic of things you can add to your Github profile. There are lots and lots of things you can add and display to your profile. It’s up to you how you want it to look and what you want to display there.
But, in case you’re not so sure about what to add or feel overwhelmed (as I was at first) with the number of options you have, I’m going to add here a link to a Github user repo in which this user has curated a very extensive list of profile pages in different categories as many resources to help you create a good looking profile. You can use this as inspiration to create your own profile.
Awesome Github Profile README Ideas
If you need a reminder on writing markdown, I’ll leave you a very useful markdown cheat sheet.